The unmistakable scent of burning rubber or electrical insulation wafting from under your car’s hood is a surefire sign of trouble. When your alternator starts smoking, it’s a cry for help that shouldn’t be ignored. This critical electrical component is the heart of your vehicle’s charging system, responsible for powering all onboard electronics and keeping your battery juiced up.
Smoke billowing from the alternator signals an impending breakdown that, if left unchecked, can lead to a complete electrical system failure and leave you stranded.
But don’t panic just yet. In many cases, a smoking alternator can be diagnosed and repaired before it self-destructs. This comprehensive guide will walk you through the common causes of alternator smoking, provide a step-by-step troubleshooting process, outline DIY repair options, and share proven preventative maintenance tips to keep your alternator running strong for years to come.
With the right know-how, you can extinguish that smoke signal and get back on the road with a fully charged, worry-free electrical system.

Alternator Basics
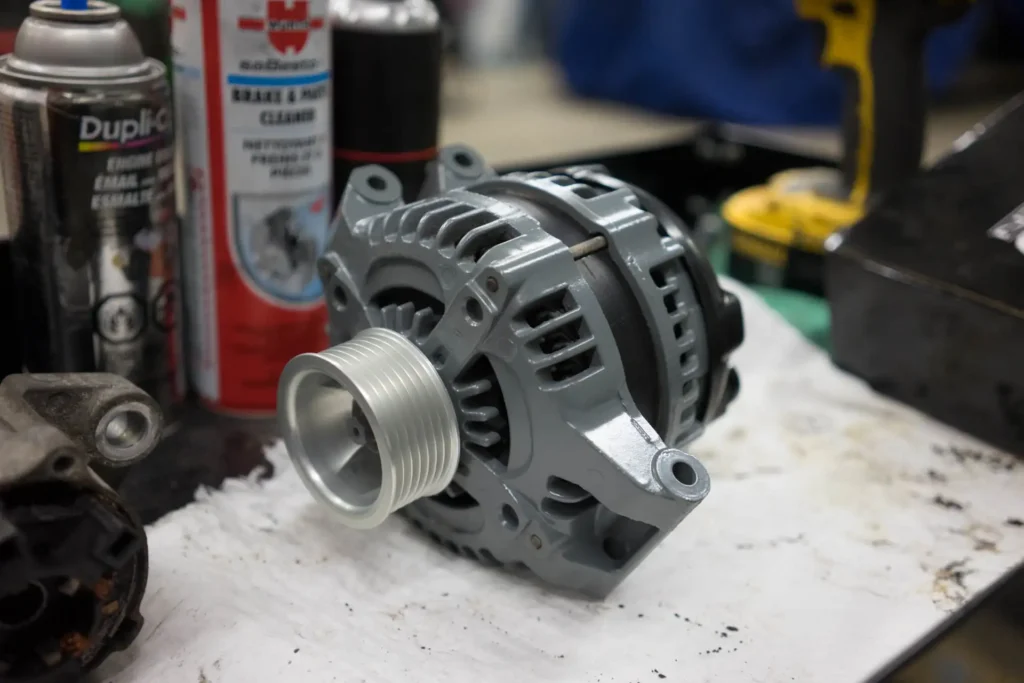
How They Work and Common Failure Points To understand why an alternator may be smoking, it’s helpful to first review how these critical components function. The alternator is essentially an electrical generator driven by the engine’s spinning crankshaft via a serpentine belt.
As the alternator’s rotor shaft spins, it rotates a series of wound copper coils (the stator) within a magnetic field, inducing an alternating current (AC). This AC is then converted to direct current (DC) by a set of rectifier diodes, providing the 12-volt power that charges your battery and runs all the vehicle’s electrical accessories.
The alternator’s key vulnerable components include:
Alternator Repair Kit – Affordable Alternator Fix
Drive Belt: Responsible for transferring the engine’s mechanical rotation to spin the alternator’s rotor. Wear, glazing, or improper tension on this belt can create excessive friction and heat.
Bearings: Allow the alternator’s shaft to spin freely and smoothly. Worn, seized, or dry bearings increase rotational resistance and heat buildup.
Brushes: Deliver current from the voltage regulator to the spinning rotor windings. Sticking or damaged brushes can cause arcing and sparking.
Stator: The stationary copper coil windings that generate the alternating current. Short circuits or insulation breakdown in the stator can lead to overheating.
Voltage Regulator: Controls the alternator’s output voltage to prevent overcharging the battery. A malfunctioning regulator that allows excessive current flow can overheat the system.
When any of these key components fail, it can disrupt the alternator’s normal operation and lead to the tell-tale symptom of smoke emerging from the unit. Let’s dive into the specific issues that may be behind your alternator’s smoky behavior.
Common Causes of a Smoking Alternator
A smoking alternator typically stems from one or more of these underlying problems:
Alternator Bearing Replacement – Smooth Rotor Spin
- Failing Bearings The alternator’s internal bearings allow the rotor shaft to spin freely and smoothly. But over time, these bearings can become worn, seized, or insufficiently lubricated. This increased rotational resistance causes excessive friction heat that builds up and smokes the surrounding components, often accompanied by a burning grease odor.
- Stuck Brushes The alternator’s brushes ride directly on the spinning rotor to transmit current from the voltage regulator. If these brushes become stuck or jammed in their housing instead of freely retracting, the increased friction can overheat and smoke them.
- Short Circuits A breakdown in the insulation between the alternator’s internal windings can create a high-resistance short circuit. This rapid current overload causes the wiring insulation to melt and smoke.
- Overloaded Voltage Regulator A malfunctioning voltage regulator that allows excessive current to flow into the battery can overload the alternator’s circuits, leading to overheating and smoking.
- Loose Drive Belt A slipping or poorly tensioned alternator drive belt builds up friction heat that can burn and smoke the rubber belt edges. This is often accompanied by a high-pitched whining noise.
- Internal Debris Small bits of carbon brush debris or copper windings that become dislodged and trapped inside the alternator can short out and create localized hot spots that start smoking.
Identifying the specific origin point of the smoke – whether it’s coming from the alternator pulley side or the electrical connector end – can help you narrow down the likely culprit. If you notice a burning oil smell from the engine bay, that may indicate a separate issue unrelated to the alternator.
Serpentine Belt Replacement – Prevent Alternator Overheating
Dangers of Continuing to Drive With a Smoking Alternator
It’s imperative to address a smoking alternator as soon as possible. Ignoring the problem and continuing to drive can lead to a cascade of escalating issues:
- Rapid battery drain as the alternator can’t keep up with electrical demands
- Complete alternator failure and total loss of battery charging ability
- Electrical fires from melting wiring insulation
- Rotor seizure and catastrophic damage if the bearings burn up
The billowing smoke is a clear sign of imminent, severe alternator failure. Shut down the engine immediately if you notice this symptom to prevent further damage. Driving on a smoking alternator is a recipe for being stranded on the side of the road with a dead battery.
Diagnosing the Root Cause of Alternator Smoking
To get to the bottom of what’s causing your alternator to smoke, you’ll need to perform a methodical inspection and testing process:
- Inspect the Drive Belt: Carefully examine the alternator drive belt for any signs of glazing, cracking, fraying, or improper tensioning that could be creating excess friction.
- Spin the Pulley by Hand: Gently rotate the alternator pulley and listen/feel for any grinding, roughness, or binding that would indicate worn bearings.
- Check Terminal Voltages: Use a multimeter to test the voltage at the alternator’s positive and negative terminals. Abnormally high readings can point to a faulty voltage regulator.
- Conduct Resistance Tests: Measure the resistance across the alternator’s windings. Unusually high resistance readings suggest a short circuit.
- Inspect the Brushes: Visually examine the alternator’s brushes for any heat discoloration, uneven wear patterns, or signs they are sticking in their housings.
- Look for Internal Debris: Carefully disassemble the alternator and inspect for any carbon brush fragments, copper shavings, or other contaminants that may be causing hot spots.
Systematically working through these diagnostic steps will help you pinpoint whether the alternator itself has failed or if an external issue is causing the overheating. From there, you can determine the appropriate repair or replacement route.
Premium Alternator Replacement – Restore Full Charging Capacity
DIY Alternator Smoking Repairs
Once you’ve identified the root cause of your alternator’s smoking behavior, you may be able to resolve the issue through targeted DIY repairs, including:
Replacing Worn Bearings If the bearings are the culprit, you’ll need to press out the old units and install matching replacement bearings with proper lubrication. Take care to also inspect the alternator shaft for any damage.
Swapping Faulty Brushes Remove and replace any brushes that appear worn, sticking, or heat-damaged. Make sure the new brushes slide freely in their guides.
Rebuilding the Voltage Regulator Diagnose and rebuild or replace the alternator’s voltage regulator assembly if it’s causing an overcharging condition.
Rewinding the Stator For short circuit issues in the stator windings, you may need to send the alternator out for a professional rewind repair. Extensive winding damage may require a full alternator replacement.
Removing Internal Debris Carefully disassemble the alternator and use an electrical contact cleaner to meticulously clean out any carbon, copper, or other contaminants that could be causing hot spots.
Replacing the Drive Belt Swap out any cracked, glazed, or excessively worn alternator drive belts with a properly sized, high-quality replacement.
With the problematic components repaired or replaced, and any internal debris removed, you should be able to restore normal alternator function and eliminate the smoking issue.
Preventing Premature Alternator Smoking
While sometimes alternator failures are simply unavoidable due to normal wear and tear, there are several preventative maintenance steps you can take to significantly extend the life of this critical component:
Use OEM-Quality Parts Avoid cheap aftermarket alternator belts, bearings, and brushes, as these non-original equipment components often wear out much faster than the parts designed specifically for your vehicle.
Address Belt Wear Promptly Don’t wait for the alternator drive belt to start shredding before you replace it. Swap it out at the first signs of glazing, cracking, or improper tension that could lead to slipping and overheating.
Maintain Proper Alignment Ensure the alternator drive belt is centered and running straight on the pulleys, without any angled contact that could create excess friction.
Keep Electrical Connections Clean Over time, corrosion can build up on the alternator’s electrical terminals and connections, increasing resistance and potentially leading to voltage spikes.
Service Air Filters Regularly Dirt and debris ingestion into the alternator can interfere with its cooling and cause overheating. Stay on top of routine air filter replacements.
Address Wiring Issues Repair any damaged or corroded wiring in the vehicle’s charging system that could be causing resistance and disrupting the alternator’s normal operation.
By taking these proactive maintenance measures, you can help prevent your alternator from reaching the point of no return – where smoke pours out and a full replacement becomes the only option.
Alternator Diagnostic Multimeter – Pinpoint Issues Quickly
Signs You Need an Immediate Alternator Replacement
In some cases, the alternator damage may be so severe that repair is no longer viable, and a full replacement is the only solution. Seek professional diagnosis right away if you encounter any of these telltale signs of imminent alternator failure:
- Thick, white or blue smoke billowing from the alternator
- A pronounced burning rubber or electrical insulation smell
- A complete loss of electrical charging function
- Visible melting or burning of the alternator’s internal wiring
These symptoms indicate the alternator has reached catastrophic failure mode and needs to be replaced before it leaves you stranded with a dead battery. Continuing to drive on a smoking alternator puts you at serious risk of a roadside breakdown or even an engine fire.
Wrapping Up
Smoke signals from your alternator are never a good sign, but with the right troubleshooting approach and a little mechanical know-how, you can often diagnose and resolve the underlying issue before it leads to a total electrical system collapse.
By staying vigilant about alternator maintenance, you can help extend the life of this vital component and keep your vehicle’s charging system running smoothly for years to come.
If you have any other questions or need further assistance, don’t hesitate to reach out to a qualified automotive repair professional. They can provide expert guidance, perform advanced diagnostics, and ensure your alternator – and the rest of your electrical system – are in top working order.

