
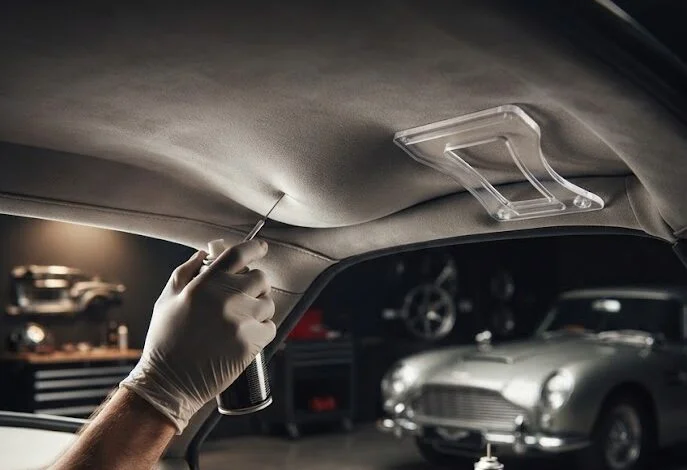
Key Takeaways / Quick Answer
- A sagging headliner can be fixed without full removal using four primary methods: headliner adhesive spray, twist pins (saggy stoppers), steam + roller reactivation, or double-sided tape — each suited to different severity levels of delamination.
- Root cause is almost always adhesive failure in the polyurethane foam backing layer, triggered by heat cycling, UV degradation, or moisture intrusion through sunroof drains or roof seams.
- Tools needed: 3M 38808 headliner adhesive (or equivalent), a clothes steamer, a 4-inch foam roller, clear twist pins, isopropyl alcohol (90%+), and a plastic trim panel tool.
- Cost to DIY: $15–$60 depending on method; professional replacement runs $200–$1,500+ depending on vehicle class and complexity.
What Is a Headliner and Why Does It Sag?
The headliner is a multi-layer composite assembly pressed against the interior roof of your vehicle. At its structural core is a headliner board — typically a semi-rigid fiberglass or polyurethane foam substrate ranging from 6mm to 12mm in thickness — bonded to the sheet metal roof with contact adhesive. Layered over that substrate is a foam-backed fabric facing, usually 4–8mm of open-cell polyurethane foam laminated to a woven or non-woven polyester fabric.
That polyurethane foam layer is the single biggest failure point. It’s chemically vulnerable to heat and hydrolysis (water-induced polymer chain breakdown). When the foam degrades, it crumbles into a powdery or sticky residue, and the adhesive bond between the fabric and the board fails completely. This is why you’ll often see the fabric droop in large, billowing sections rather than just at the edges — the substrate itself has disintegrated.

Understanding this layered construction is critical because it determines which repair method will actually hold and which is just a temporary cosmetic patch.
The 5 Root Causes of Headliner Sagging (Technical Breakdown)
1. Thermal Cycling and UV Degradation
This is the #1 cause in warm climates. Interior roof temperatures in a parked vehicle can exceed 160°F (71°C) in direct sunlight — well above the softening threshold of most hot-melt and contact adhesives, which begin losing shear strength at 140–150°F. Over hundreds of heat cycles, the adhesive embrittles and loses cohesion. UV radiation accelerates this by breaking down both the foam’s ester or ether polyurethane chains and the adhesive polymer structure.
2. Hydrolytic Foam Degradation
Ester-based polyurethane foams (common in vehicles manufactured in the 1990s–2000s) are highly susceptible to hydrolysis. Moisture intrusion from a failing sunroof seal, a compromised roof rail, or even high ambient humidity can cause the foam backing to literally disintegrate — not just soften. When this happens, there’s no longer a substrate for the fabric to bond to, and no adhesive will hold permanently without addressing the moisture source first.
3. Failed Factory Adhesive
Some OEM headliner installations, particularly on high-volume production vehicles, used water-based contact adhesives that have a finite service life. In vehicles over 10–12 years old, this adhesive has often reached its end of life regardless of climate.
4. Physical Damage from Passengers or Cargo
Passengers pushing upward on the headliner while loading or unloading, children pressing on it repeatedly, or items stored on roof racks that cause panel flex all introduce peel stress at the fabric-to-foam bond line — the weakest interface in the assembly.
5. Improper Previous Repair
A previous owner who used the wrong adhesive — super glue, rubber cement, or spray adhesives not rated for high-temperature automotive use — may have left behind a contaminated, non-porous surface that prevents proper re-adhesion.
Diagnostic Troubleshooting Matrix: Identify Your Headliner Problem Before You Fix It
This table is your first stop. Misidentifying the severity or cause leads to wasted time and materials.
| Symptom | Likely Root Cause | Foam Condition | Best Repair Method | Repair Permanence |
|---|---|---|---|---|
| Sagging at edges/corners only | Adhesive failure at perimeter | Intact | Spray adhesive re-bond | High (2–5 years) |
| Large billowing section mid-panel | Full foam delamination | Intact but separated | Spray adhesive + roller | Medium (1–3 years) |
| Fabric drooping and powdery residue falling | Hydrolytic foam breakdown | Disintegrated | Twist pins (structural fix lost) | Low — consider full replacement |
| Sagging around sunroof opening | Moisture intrusion + adhesive failure | Waterlogged/soft | Dry out, treat moisture source, spray adhesive | Medium (fix leak first) |
| Uniform full-panel sag, older vehicle | End-of-life factory adhesive | Usually intact | Steam reactivation + roller | Medium-High |
| Sagging in one spot after minor impact | Bond shear from flex | Intact | Double-sided tape or spot adhesive | High (spot repair) |
| Rippling/bubbling rather than sagging | Wrong adhesive applied previously | Contaminated | Strip and re-bond with correct adhesive | High (if done correctly) |
| Fabric fully detached and hanging | Combined foam + adhesive failure | Degraded | Full substrate inspection; likely replacement needed | Low without removal |
Method 1: Headliner Adhesive Spray Re-Bond (Best for Partial Delamination)
This is the most structurally sound non-removal repair method when the foam backing is still physically intact. The key is selecting the correct adhesive — this cannot be overstated.
Adhesive Selection: What Actually Works
| Product | Type | Temp Resistance | Open Time | Best Use Case |
|---|---|---|---|---|
| 3M 38808 Super Trim Adhesive | Aerosol contact cement | 200°F+ | 60–90 sec | OEM-quality re-bond, edges & full panels |
| Permatex 80065 Body & Trim Adhesive | Aerosol contact cement | 180°F | 45–60 sec | General re-bond, budget option |
| Loctite General Performance 100 | Aerosol contact cement | 150°F | 60 sec | Light-duty, edge repairs only |
| Weldwood Original Contact Cement | Brush-on contact cement | 200°F | 2–5 min | Heavy-duty, full panel work |
| 3M Headliner and Fabric Repair | Aerosol | 180°F+ | 60 sec | Specifically formulated for headliners |
Do not use: WD-40, rubber cement, Gorilla Glue, construction adhesive, or generic craft spray adhesives. Their viscosity, open time, and thermal properties are incompatible with headliner fabric and foam substrates.
Step-by-Step Spray Adhesive Re-Bond Procedure
Materials Required:
– 3M 38808 or equivalent headliner adhesive
– 90%+ isopropyl alcohol
– Clean microfiber cloths
– Plastic trim panel tool (to peel back fabric safely)
– Nitrile gloves
– Painter’s tape
– 4-inch foam roller
Step 1: Assess and Expose the Delamination Zone
Using a plastic trim panel tool — never a metal screwdriver, which will puncture the foam — gently work the sagging fabric back from the headliner board. Fold it back carefully to expose both the fabric’s foam-backed underside and the bare headliner board surface. Inspect the foam: if it crumbles or is powdery, skip to Method 3 (twist pins) or consult a trim shop for full replacement.
Step 2: Surface Preparation (Critical Step)
Wipe both the headliner board surface and the back of the fabric with 90% isopropyl alcohol on a clean microfiber cloth. Remove all old adhesive residue, dust, and foam particles. Allow to fully dry — minimum 10 minutes. Any contamination will compromise the new adhesive bond.
Step 3: Apply Adhesive to Both Surfaces
Hold the aerosol can 6–8 inches from the surface and apply an even, thin coat to both the headliner board and the fabric backing simultaneously. This is contact cement — it must be applied to both mating surfaces for a proper bond. Use a sweeping motion for uniform coverage.
Step 4: Observe Open Time
Allow the adhesive to become tacky but not wet — approximately 60–90 seconds for 3M 38808 at room temperature. In hot weather, open time decreases; in cold weather, it increases. The surface should feel slightly sticky to a light knuckle touch but not transfer adhesive.
Step 5: Bond and Roll
Carefully fold the fabric back into position, starting from the center and working outward to prevent air bubbles and wrinkles. Immediately roll firmly with the 4-inch foam roller using 8–10 lbs of pressure in overlapping strokes. This mechanical pressing action is what activates the contact bond.
Step 6: Cure Time
Allow a minimum of 2 hours before disturbing. Full cure is typically 24 hours. Avoid extreme heat (like direct summer sun) during initial cure.

Method 2: Steam Reactivation (Best for Full-Panel Edge Sagging)
This method exploits a specific property of contact cements: they are thermally reactivatable. When you apply steam heat, the original factory adhesive softens and becomes workable again. This works only if the original adhesive is still present on both surfaces — it does not work if the foam has delaminated and the adhesive surfaces are no longer in contact.
Equipment Needed
- Clothing steamer (1,500+ watt recommended; a steam iron on high will also work)
- 4-inch foam roller
- Clean towels
Procedure
- Work in 12-inch sections along the sagging edge.
- Hold the steamer 2–3 inches from the headliner fabric for 15–20 seconds per section. The steam penetrates the fabric and heats the adhesive beneath.
- Immediately while the substrate is warm, use the foam roller to firmly press the fabric back into the headliner board. Apply pressure for 15–20 seconds per section.
- Move to the adjacent section before the previous one cools. Work systematically from one end to the other.
- Allow to cool and cure for at least 30 minutes before testing adhesion.
Important caveat: Do not over-steam. Excessive moisture can worsen hydrolytic foam degradation — ironic given you’re using steam, but the key is controlled, brief exposure. If the fabric appears wet or the foam underneath becomes soggy, stop immediately and allow to dry completely before attempting any other repair.
Method 3: Twist Pins / Saggy Stoppers (Best for Severely Degraded Foam)
When the polyurethane foam has broken down to the point where adhesive cannot get a mechanical bite, twist pins (commercially sold as “Saggy Stoppers” or headliner pins) are your only non-removal option. These aren’t a structural fix — they’re a mechanical solution that bypasses the compromised adhesive layer entirely.
Twist pins are helical metal or plastic pins, approximately 1–1.5 inches in length, with a broad flat head. They thread through the fabric and into the foam substrate using a twisting motion, gripping the fibers without requiring a sharp puncture that would leave a visible hole.
Installation Technique
- Clean the headliner fabric surface with a dry microfiber cloth.
- Place twist pins every 8–12 inches along the sagging area, working in rows.
- For aesthetic purposes, align pins in a symmetrical grid pattern — this looks intentional rather than like a hasty repair.
- In areas near edges or trim pieces, install pins 1 inch from the trim edge so the trim itself covers the pin heads.
- Clear-headed pins (with a transparent or white head) are nearly invisible from normal viewing distance in a vehicle with standard lighting.
Pro tip: This method is particularly effective in vehicles where full replacement would cost nearly as much as the vehicle’s value — a very real scenario with high mileage domestic sedans. A sagging headliner significantly degrades interior acoustics and thermal comfort; if you’ve ever wondered why is your car so loud even with windows up, a delaminated headliner removing its sound-dampening function is a frequently overlooked contributor.
Method 4: Double-Sided Headliner Tape (Best for Localized Spot Repairs)
For small, localized sags — typically a 6–12 inch section around the sunroof frame, sun visor mount points, or dome light cutouts — double-sided automotive trim tape provides a clean, adhesive-free (from the visible side) repair.
Recommended products:
– 3M 03609 Molding Tape (0.045″ thickness, 180°F rated)
– Tesa 61395 Double-Sided Foam Tape
Procedure: Clean both surfaces with IPA. Cut tape strips to size. Apply to the headliner board surface, not the fabric. Peel the release liner and press fabric firmly into position. Use a roller or firm thumb pressure for 30 seconds.
This method is not suitable for large areas — the tape’s total bonding surface is insufficient for panels larger than roughly 12″×12″.
Repair Method Comparison: Cost, Difficulty, and Durability
| Method | DIY Cost | Difficulty | Time Required | Best Sagging Severity | Durability Estimate |
|---|---|---|---|---|---|
| Spray Adhesive Re-Bond | $8–$20 | Moderate | 1–3 hours | Partial to full panel | 2–5 years (climate dependent) |
| Steam Reactivation | $20–$50 (steamer) | Moderate | 1–2 hours | Edge/perimeter sagging | 1–4 years |
| Twist Pins / Saggy Stoppers | $8–$15 | Easy | 30–60 min | Any severity | Indefinite (mechanical hold) |
| Double-Sided Tape | $10–$25 | Easy | 30 min | Localized spots only | 2–4 years |
| Professional Full Replacement | $200–$1,500+ | N/A (shop job) | 4–8 hours labor | Complete failure | 10+ years |
Critical Pre-Repair Step: Address the Moisture Source
If your diagnosis points to moisture intrusion (waterlogged foam, musty odor, visible staining), no adhesive repair will provide lasting results until the water source is eliminated. Common entry points include:
- Sunroof drain tubes: These 6–8mm diameter drain tubes route from the sunroof tray to drain points in the door sills or wheel wells. They become clogged with leaf debris and atmospheric particulate. The sunroof tray overflows and saturates the headliner from above. Use a thin flexible wire or compressed air to clear the drains.
- Roof rail weatherstripping: Cracked or compressed neoprene weatherstripping at the roof rail allows water to track inward during rain. Inspect and replace as needed.
- Antenna base seals: The antenna mast grommet is a common but rarely considered water entry point.
Only after eliminating the moisture source should you proceed with adhesive repair. The ASE (Automotive Service Excellence) recommends thorough moisture inspection before any interior trim repair to prevent recurring delamination — a best practice aligned with guidance from professional certification standards at ase.com.


