
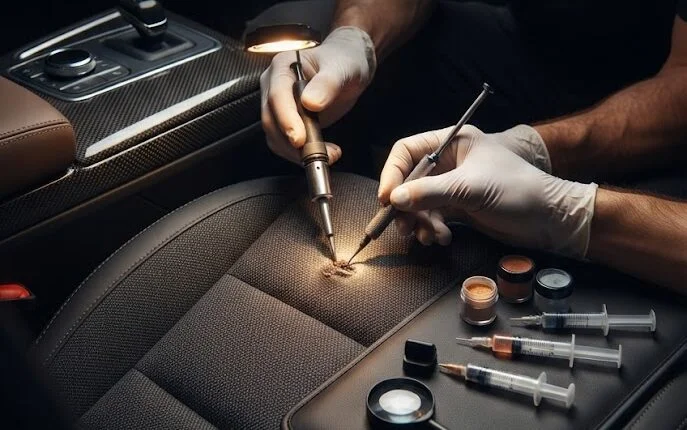
Key Takeaways
- Cigarette burns in car upholstery can be repaired using three proven methods: thread reweaving, fabric gluing, or a commercial upholstery repair kit — each suited to a specific material type (woven fabric, velour, or leather/vinyl).
- Severity determines method: Surface scorches need only filler compound and color-match; full-thickness holes through the foam substrate require patch backing, foam sub-fill, and topcoat sealing.
- Core tools needed: Curved scissors, stiff-bristle brush, upholstery adhesive or repair compound, color-matching filler, heat source (heat gun set to 200–250°F), fine-grit sandpaper (400–600 grit), and grain pad.
- Professional intervention is warranted when the burn exceeds 1 inch in diameter, penetrates the seat foam, or involves leather panels with embossed grain that requires factory-matched texturing.
Understanding the Damage Before You Touch a Single Tool
Before you reach for any repair kit, you need to triage the burn. Cigarette combustion temperatures average around 1,650°F (900°C) at the coal tip — more than enough to melt synthetic fibers, scorch natural fabrics, and carbonize foam beneath. What looks like a minor surface blemish from two feet away could be a layered failure involving:
- The face fabric or leather grain layer
- The scrim or backing weave
- The urethane foam cushion substrate
Attempting a cosmetic repair over compromised foam creates a visual fix that will collapse and re-open within months. Press gently around the burn perimeter with your fingernail. If the area feels spongy, hollow, or crumbles, you have foam involvement and need to address that sub-layer first.

Identifying Your Upholstery Material: The Critical First Step
Using the wrong repair chemistry on the wrong substrate is the single most common DIY mistake. Here’s how to quickly identify what you’re working with:
- Woven fabric/cloth: Visible interlocking fiber pattern, breathable, tends to char and leave blackened threads.
- Velour: Soft, cut-pile surface with a plush appearance — extremely sensitive to solvents and heat; fibers melt rather than char.
- Vinyl/PVC: Smooth, slightly plasticky feel; burns leave a melted, glossy cratered edge rather than charred fibers.
- Genuine leather: Distinct grain pattern, warm to the touch, burns leave a hardened, darkened crust that doesn’t pull apart like fabric.
- Alcantara/microsuede: Ultra-fine synthetic suede feel; requires specialized water-based compounds only — no solvent adhesives.
Method 1: Thread Reweaving (Best for Woven Fabric Seats)
This is the highest-fidelity repair technique for woven cloth interiors. Done correctly, it is genuinely invisible at conversational distances. The underlying principle is simple: you are harvesting intact thread from a hidden area of the same seat or panel and reconstructing the weave over the void.
Tools Required
- Fine-point seam ripper
- Curved embroidery needle (size 22–24)
- Stiff-bristle detailing brush
- Fabric scissors (curved blade preferred)
- Fine-pointed tweezers
- Donor thread from seat seam allowance, under-seat material, or trunk liner (must match fiber content and weave direction)
- Clear fabric sealant (non-yellowing acrylic type)
Step-by-Step Procedure
Step 1 — Debride the burn zone. Using curved scissors, trim all carbonized, friable fiber flush with the undamaged weave surface. Do NOT pull threads — cut them. Pulling unravels the surrounding weave and expands your damage footprint.
Step 2 — Harvest donor thread. Locate the seam allowance on the underside of the seat cushion or from a hidden panel. Using the seam ripper, carefully extract threads that match the warp (vertical) and weft (horizontal) directions. You need at minimum 3× the linear thread length of your repair diameter in each direction.
Step 3 — Prepare a backing base. Cut a small piece of heat-resistant iron-on interfacing approximately 0.5 inches larger than the burn on all sides. Apply it to the reverse side of the fabric (accessible from underneath the seat cover if removed, or by carefully lifting the edge of the material). This gives your new threads a substrate to anchor to.
Step 4 — Begin reweaving. Thread your curved needle with a warp-direction donor thread. Working from the outer undamaged edge inward, weave the needle under and over the existing undamaged threads at the burn perimeter, drawing the new thread across the void. Maintain the same over-under cadence as the original weave. Tension should replicate the surrounding fabric — not too loose, not pulled tight.
Step 5 — Alternate weft threads. Once warp threads cover the void, begin weaving weft threads perpendicular, interlocking them through your new warp threads in the correct sequence. Use tweezers to manipulate threads in tight spaces.
Step 6 — Secure and seal. Once the weave is complete, apply a thin bead of clear fabric sealant around the perimeter of the repair using a pin or toothpick. This locks the thread ends without visible residue. Allow 2 hours cure time before touching.
Method 2: Fabric Gluing (Best for Velour and Delicate Pile Fabrics)
Velour cannot be reweaved — the cut pile structure does not lend itself to needle work. Instead, you are cutting a precise patch from donor material and bonding it into the void with a flexible, heat-stable upholstery adhesive.
Tools Required
- Precision craft knife with fresh #11 blade
- Metal ruler or circle template
- Upholstery contact cement (3M 08090 or equivalent, low-VOC)
- Donor velour fabric (from seat seam allowance or matching source)
- Soft roller or wooden dowel for pressure application
- Acetone (for surface prep of the burn edges only)
- Nitrile gloves
Step-by-Step Procedure
Step 1 — Create a clean geometric void. Using the craft knife and ruler, cut the damaged area into a clean shape — either a circle or a rectangle with defined edges. Irregular shapes make patch-cutting and alignment nearly impossible. Cut through the face fabric only; do not cut into the foam.
Step 2 — Degrease the perimeter. Apply a small amount of acetone to a cotton swab and run it around the cut edge of the existing fabric. This removes any residual burn oils or silicone from previous detailing products that would compromise adhesive bonding.
Step 3 — Cut the matching patch. From your donor velour, cut a patch that is exactly 1–2mm smaller than your void on all sides. This prevents edge lifting. Ensure the pile direction of the patch matches the pile direction of the surrounding seat fabric — run your hand across both to confirm the nap flows in the same direction.
Step 4 — Apply contact cement. Apply a thin, even coat of upholstery contact cement to both the backing of the patch and the exposed void area. Allow both surfaces to tack (typically 5–8 minutes; the cement should feel dry to the touch but remain tacky). Do NOT apply to the pile face.
Step 5 — Bond and press. Carefully align the patch — once contact cement surfaces touch, repositioning is extremely difficult. Press firmly with a wooden dowel or roller, working from center outward to eliminate air pockets. Apply sustained pressure for 60 seconds.
Step 6 — Brush and blend. Using a soft detailing brush, gently work the pile of the patch and surrounding fabric in a uniform direction. From normal viewing distance, a properly executed velour patch repair is undetectable.
Method 3: Upholstery Repair Kit (Best for Leather, Vinyl, and Alcantara)
For non-fabric surfaces — leather, vinyl, and synthetic microsuede — chemical filler-based repair kits provide the most professional results achievable outside a body shop. The chemistry works by building up layers of flexible compound that are then heat-fused and grain-textured to match the surrounding surface.

Tools and Kit Contents Required
- Automotive upholstery repair compound kit (LeatherMaster, Leather Magic, or SEM Products equivalent)
- Color-matching submaster pigments (reds, yellows, blacks, whites for mixing)
- Flexible grain embossing pads (matching OEM grain pattern)
- Precision heat tool or heat gun (temperature-controlled, 250–350°F range)
- 400-grit and 600-grit wet/dry sandpaper
- Isopropyl alcohol (90%+ concentration) for surface prep
- Mixing palette and palette knife
- Fine artist’s brush (size 0 or 00) for detail work
- Nitrile gloves and proper ventilation
Step-by-Step Procedure
Step 1 — Surface preparation. Clean the entire repair area and a 3-inch radius around it with 90%+ isopropyl alcohol on a lint-free cloth. This removes waxes, conditioners, and skin oils that will prevent compound adhesion. Allow to fully evaporate (approximately 5 minutes).
Step 2 — Remove carbonized edges. Using 400-grit sandpaper, very lightly sand the hardened, carbonized crust around the burn crater. You are removing dead material, not abrading the surrounding leather. Wipe away dust with a tack cloth.
Step 3 — Address foam voids (if present). If the burn has created a depression due to foam melt-back, fill the sub-level void first with a flexible backing compound (included in premium kits) and allow it to cure per manufacturer specification — typically 30–60 minutes at ambient temperature — before applying face compound.
Step 4 — Color-match the filler. This is the highest-skill step. Using the mixing palette, blend the included pigments to match your seat’s exact color under natural lighting. Start with the closest base color, then add tiny amounts of correction tints. Test the mixed color on an inconspicuous area (under the seat or on a hidden panel seam) and allow it to dry before comparing — color filler always dries 10–15% lighter than wet.
Step 5 — Apply compound in thin layers. Load a small amount of color-matched compound onto a palette knife and spread it into the repair void in thin, even coats no thicker than 0.5mm per layer. Allow each layer to fully cure before applying the next — resist the urge to build up in one pass. Typical repairs require 3–5 layers.
Step 6 — Heat fuse each layer. Using a heat tool at 250–300°F (held 2–3 inches from the surface), apply moving heat passes across the compound for 10–15 seconds per layer. This chemically cross-links the filler into the leather substrate rather than sitting on top of it. Do not dwell in one spot.
Step 7 — Grain texture application. Once the final compound layer is built to flush with the surrounding surface and still slightly warm, press the grain pad firmly onto the repair for 10 seconds. The embossed pad imprints the factory grain pattern into the still-flexible compound. This step is what separates a professional-looking result from an obvious repair.
Step 8 — Final sanding and finish. Once fully cured (minimum 24 hours), lightly sand with 600-grit wet/dry paper using water as lubricant to flatten any texture high spots. Apply a leather finish coat (gloss or matte to match OEM sheen) and buff gently with a microfiber cloth.
Cigarette Burn Repair: Material & Method Diagnostic Matrix
| Upholstery Type | Burn Depth | Recommended Method | Repair Kit Type | Difficulty Level | Expected Result |
|---|---|---|---|---|---|
| Woven cloth fabric | Surface scorch only | Thread reweaving | No kit needed | Moderate | Near-invisible |
| Woven cloth fabric | Through to foam | Reweave + foam sub-fill | Backing compound | High | Very good |
| Velour/cut pile | Surface only | Fabric glue patch | Contact cement | Moderate | Good |
| Velour/cut pile | Through to foam | Patch + foam sub-fill | Contact cement + backing | High | Good |
| Vinyl/PVC | Surface crater | Repair compound kit | Vinyl filler kit | Moderate | Excellent |
| Vinyl/PVC | Full hole | Backing patch + filler | Full vinyl repair kit | High | Very good |
| Genuine leather | Surface scorch | Filler compound + grain | Leather repair kit | High | Excellent |
| Genuine leather | Full hole | Sub-patch + filler + grain | Professional leather kit | Expert | Professional |
| Alcantara/microsuede | Any depth | Professional service only | N/A | Expert only | Variable |
| Perforated leather | Any depth | Professional service only | N/A | Expert only | Variable |
Cost Breakdown: DIY vs. Professional Repair
| Repair Scenario | DIY Material Cost | Professional Shop Estimate | Time Investment (DIY) |
|---|---|---|---|
| Single small burn (<0.5″) – cloth | $0–$15 (donor thread only) | $75–$150 | 1–2 hours |
| Single small burn (<0.5″) – vinyl/leather | $25–$60 (repair kit) | $100–$200 | 2–3 hours |
| Multiple burns (3–6) – cloth | $15–$30 | $200–$400 | 4–6 hours |
| Multiple burns (3–6) – leather | $40–$80 | $300–$600 | 5–8 hours |
| Large burn (>1″) with foam damage | $50–$120 | $350–$700 | Full day |
| Full seat reupholster (worst case) | $150–$400 (DIY materials) | $500–$1,500 per seat | Multi-day |
Pro Tips From the Shop Floor
Test heat on a hidden area first. Every heat tool behaves differently. Before applying heat to your repair, test your gun’s output on the underside of the seat to confirm temperature calibration. Vinyl in particular can blister permanently if exposed to heat above 350°F.
Humidity affects cure time. Filler compounds cure through solvent evaporation and heat cross-linking. In humid climates above 70% relative humidity, add 25–30% more cure time between layers. Rushing this causes delamination.
Never use super glue as a primary repair compound. Cyanoacrylate adhesives are rigid when cured and will crack with seat flexion within weeks. They also create a glossy halo on fabric that is nearly impossible to remove without damaging surrounding fibers.
Seat covers are a legitimate final option. For cars with pervasive burn damage or Alcantara that requires prohibitively expensive professional restoration, high-quality form-fitted seat covers from brands like Covercraft or Wet Okole provide an excellent aesthetic and protective solution — and they protect against future incidents.
Maintaining your car’s interior condition is part of responsible ownership — just as monitoring mechanical health matters. If you’re also keeping tabs on long-term ownership costs, understanding how economy metrics like the Subaru Forester miles per gallon figures factor into your total cost of ownership is equally important for resale value planning.

When to Call a Professional Upholstery Shop
Escalate to a certified upholstery technician when:
- The burn diameter exceeds 1 inch
- Foam substrate has melted or collapsed more than 0.25 inches below the surface
- The seat involves perforated leather with an active ventilation or heating element beneath
- The seat contains an integrated side-curtain airbag — cutting or manipulation of seat fabric near airbag deployment zones is a critical safety concern and should never

